
A tall cake slices clean and impressive, but only if you freeze the assembled layers overnight before frosting. Without that step, crumbs tear loose for three coats and the thing leans under its own height.
The collar method changes the math: line the pan with acetate to extend the walls upward, and a single thick bake splits into true layers you could not otherwise get from a shallow pan.
What You Need

A tall cake builds from the same base as any layer cake, with a few additions for height and stability. Here is what I pull together before I start.
- Cake pans in 6-inch, 8-inch, 10-inch, or 12-inch diameters, two to three inches high so the batter has room to rise; I reach for 8-inch most often because the layers are taller and easier to handle than wider sizes
- Parchment paper or silicone mats to line the bottoms; precut circles save time, or trace the pan and cut your own
- Bake-even strips wrapped around the outside of the pans; insulating the edges slows the bake and keeps the layers from doming too much
- Cake board one to two inches wider than your finished cake, to build on instead of a plate
- Dowels for any cake over 7 inches tall, to support the upper tiers and keep them from sinking
- Acetate or parchment for a cake collar, to wrap around the layers while the filling sets and hold the sides straight
- Turntable, cake scraper (taller than your assembled cake), offset spatula, and serrated knife or cake leveler for smoothing and leveling
- Filling of choice: buttercream, mousse, ganache, whipped cream, fruit preserves, or custard
How to Make a Tall Cake

- Prepare the pans by greasing and flouring the bottoms and sides, then pressing parchment circles into each base. Wet bake-even strips before wrapping them around the outside edge; this slows the edges from setting too fast and keeps the layers flat instead of domed. A double layer of foil works if you do not have strips.
- Fill the pans and bake, but watch darker metal closely. Dark pans conduct heat harder and faster, so the edges and bottom brown sooner and the layer can overbake while the center catches up. Rotate halfway through if your oven has hot spots.
- Once cooled, trim any slight dome with a serrated knife so the layers stack flat. If you want more layers than pans, tort each cake horizontally through the middle.
- Alternate cake and filling inside the pan, building as high as the pan wall allows. When you hit the rim, tuck a strip of acetate or a double layer of parchment inside so it stands flush against the sides and extends upward like a collar. Overlap the ends. Add a second strip if the cake outgrows the first.
- Seal the assembled cake in two layers of plastic wrap and freeze overnight. The cold hardens the butter in the cake and filling into a single solid block, so the structure holds when you remove the collar later.
- Unwrap, peel away the acetate while the cake is still frozen, and frost. The frozen surface takes buttercream cleanly without crumbs tearing loose.
Tall Cake vs. Double-Barrel

A tall cake gains height by adding layers inside a single structure, usually with a parchment or acetate collar extending the pan walls.
A double-barrel cake is two complete cakes stacked with a board and dowels between them. Both can reach 8 to 10 inches, but the engineering differs.
For heights up to about 6 inches, a tall cake built in one piece is simpler and gives cleaner sides. Past 7 inches, doweling becomes non-negotiable either way.
The double-barrel handles that threshold more gracefully because the internal board and supports are already part of its design. It also lets you serve the top tier separately if the guest count shifts.
| Tall cake | Double-barrel | |
|---|---|---|
| Structure | Single build, collar extended | Two cakes, board + dowels between |
| Typical height | 5–7 inches | 8–10 inches |
| Best use | Moderate height, clean finish | Maximum height, flexible serving |
| Dowels required | Above 7 inches | Always |
Choose the tall cake when you want height without the visible seam of a stacked cake. Choose double-barrel when stability matters more than a continuous profile or when you need to feed a crowd and keep options open.
Cake Flavors and Fillings

Vanilla, chocolate, yellow, and fruit-infused cakes all work for tall builds, though the sturdier the crumb, the cleaner your slice.
Buttercream, ganache, and mousse hold their shape under weight; whipped cream, fruit preserves, and custard need more care because they soften and can press out between layers, causing the sides to bulge after stacking.
The filling layer should be thin and level, with a piped rim of stiff buttercream around each cake layer to create a dam.
This wall keeps softer fillings from migrating outward. I also freeze mousse-filled cakes rather than refrigerate them, since gelatin-based mousse sets firm when cold and only softens to eating texture once it thaws.
A frozen assembly is easier to smooth and far less likely to shift under its own height.
Sugar syrup brushed onto interior layers adds moisture without hurting structure, but skip the top and bottom surfaces or you add slip where the cake meets the board and the crumb coat.
Pan Size and Layer Math
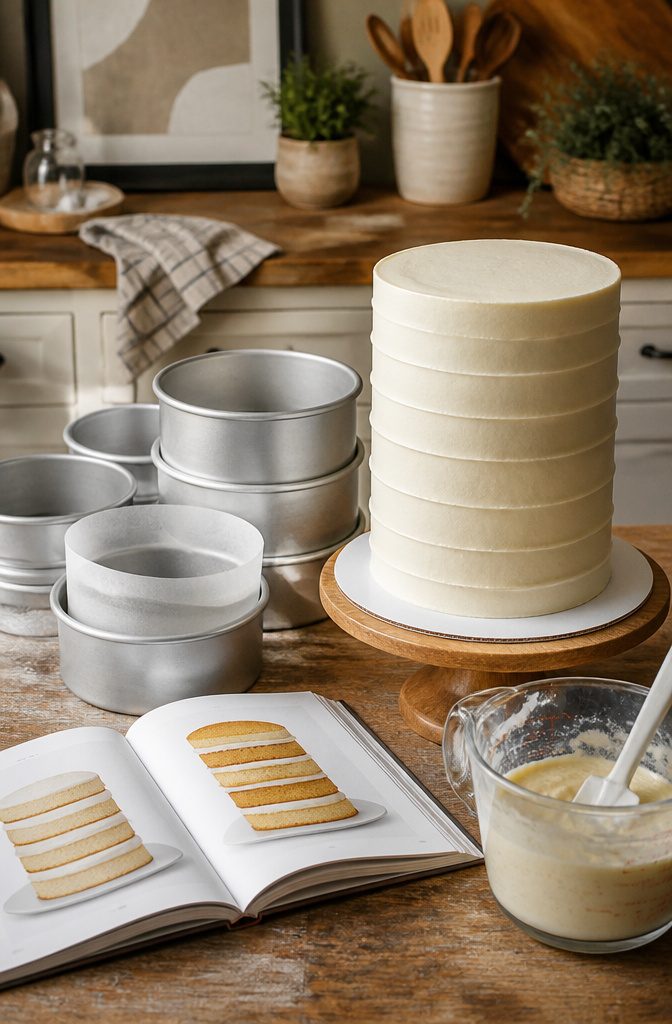
A 6-inch pan is the practical starting point for tall cakes, since its smaller footprint lets you stack 4 to 6 layers before the structure gets unwieldy.
Each layer bakes 2 to 3 inches tall, so a standard two-layer cake sits at 4 to 6 inches total; that is where most home recipes stop, and where a tall cake actually begins.
An 8-inch pan spreads the same batter wider, so you need more of it to reach equivalent height, while 10-inch and 12-inch pans demand so much volume that going tall quickly becomes expensive and heavy.
The collar method changes the math. You line the pan with parchment, wax paper, or acetate to extend the walls upward, then bake a thicker single layer that you later split.
This lets you build a tall cake without owning deeper pans, and it works even in shallow 2-inch pans.
I find the collar especially useful for 8-inch rounds, where standard depth would otherwise force two separate bakes to get four true layers.
Why I Freeze Before Frosting

A tall cake has more surface area to catch crumbs and more height to magnify every ripple, so freezing the assembled layers overnight before you frost changes the whole job.
Wrapped tightly in plastic, the cake hardens into one solid block.
The butter in both the crumb and the filling firms up, giving you a surface as smooth as a chilled stick of butter rather than a soft sponge that dents under your spatula.
I learned this from watching the difference between a cake I frosted at room temperature and one I froze.
The unfrosted cake shed crumbs into the buttercream for three coats before I got a clean finish; the frozen one took a single thin layer of crumb coat, ten minutes to set, and the final coat went on glass-smooth.
For a standard two-layer cake the freeze might save you fifteen minutes of frustration. For a six-layer tall cake it is the difference between a steady hand and a swaying tower that threatens to lean.
The overnight timing matters because a short chill, even a couple of hours, only crusts the outside.
The center stays soft enough to shift under pressure. Eight to twelve hours lets the cold reach through every layer so the whole structure holds still while you work.
Frequently Asked Questions
How do I make a tall cake?
Stack multiple layers of cake with filling between them, using a parchment or acetate collar inside the pan to extend the walls if the cake outgrows the pan height.
Freeze the assembled cake overnight before frosting so the butter in the cake and filling hardens into a single solid block. This gives you clean sides and keeps crumbs from tearing loose when you apply buttercream.
What is the difference between a tall cake and a double-barrel cake?
A tall cake is one continuous build with layers added inside a single structure, often using a collar to extend the pan walls.
A double-barrel cake is two complete cakes stacked with a board and dowels between them. Both can reach 8 to 10 inches, but the double-barrel handles heights above 7 inches more gracefully because its internal supports are built into the design.
How do I prevent my cake from doming?
Wrap wet bake-even strips around the outside of the pans before baking; the insulation slows how fast the edges set and keeps the layers flat.
A double layer of foil works if you do not have strips. Dark metal pans conduct heat harder and faster, so watch them closely and rotate halfway through if your oven has hot spots.
What are tall cakes called?
Tall cakes are also called extended-height cakes. A related but different style is the double-barrel cake, which is two complete cakes stacked with a board and dowels between them rather than one continuous build.
How much does a 6 inch tall cake feed?
For serving estimates, a standard 6-inch round typically feeds 8 to 12 people depending on slice size.