
Simple cake designs run from a single glaze on a loaf-shaped tea cake to a two-tier semi-naked stack with pearl rings, and the right choice depends on whether you own a rotating cake stand.
Without one, you are limited to techniques that work on a countertop: diagonal piped lines, a ganache pour, or a palette-knife texture that hides uneven spots rather than correcting them.
The rotating stand plus a bench scraper and offset spatula, none costing more than a midweek dinner out, opens up rosette borders, ombre bands, and the clean edges that make a sprinkle band or confetti edge read as intentional rather than a cover-up.
1. Round Cake with Rosettes

A round cake with one ring of pink rosettes and a clean top is the birthday design that keeps coming up in recommendations.
It makes sense: the rosettes add color and texture, the open center leaves room for a name in frosting or a small candle arrangement, and the single border means you are not wrestling with full coverage.
I like that this design travels well. The rosettes sit low enough that a cake carrier lid clears them, and because the decoration is concentrated at the edge, a bump in transit does not ruin the whole look.
The whipped cream holds up for a few hours outside the fridge, though I would not push it past that in summer.
The clean top is the detail that makes this practical for birthdays. Skip the piped message if you want; the name can go in candles, a small banner, or even edible marker on the bare frosting.
For the pink, ask for a color code or bring a photo. Whipped cream rosettes darken as they set, so the shade you see in the bowl is lighter than what you will get two hours later.
2. Ombre Cake

A round ombre cake keeps the decoration in the frosting itself, which means the finish does the work while you skip the piping bags.
The version that lands best goes from deep blue at the base to white at the top, each tier of buttercream slightly lighter than the one below it.
Ask the baker to keep the shell border small so the color gradation stays the focal point and the edge does not compete with it.
Color matching is where home bakers usually guess and miss. Bring a photo of the exact ombre you want, but also ask for the color code the bakery used to mix that shade of blue.
Gel food color formulas vary by brand, and "navy" at one shop reads as royal at another.
A baker who hands you the code, say a ratio like four parts royal blue to one part black, gives you a repeatable result if you ever recreate the cake for another event.
The ombre reads as fancy without requiring fondant skills or a turntable that spins both ways. You smooth each band separately, blend where they meet with a bench scraper, and the line between colors softens into the gradient.
3. Ganache Cake

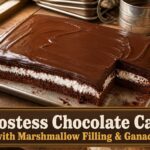
A chocolate cake finished with glossy ganache and a pinch of edible gold dust reads as something you paid a pastry shop to do, yet the whole thing comes together with two ingredients and a bowl.
Pour warm ganache over a set cake and let gravity pull it down the sides in one continuous sheet.
The surface stays liquid long enough for you to nudge any bare spots, then it sets into a mirror you could almost check your reflection in.
That dark finish is where the edible gold dust earns its keep. A tiny pinch brushed along the top edge catches light the way a candle catches a dark room.
Without it, the cake looks rich but flat; with it, the contrast between the deep brown and the metallic flash gives the eye somewhere specific to land.
Use less than you think, because gold dust that reads as a stripe instead of a glint looks like a craft project.
Timing is the only catch. Ganache needs a fully cooled cake or it will melt the crumb underneath and slide right off.
If your kitchen runs warm, chill the cake first. The finish will dull slightly in the refrigerator, but a minute at room temperature brings the gloss back before you serve.
4. Square Cake with Dots
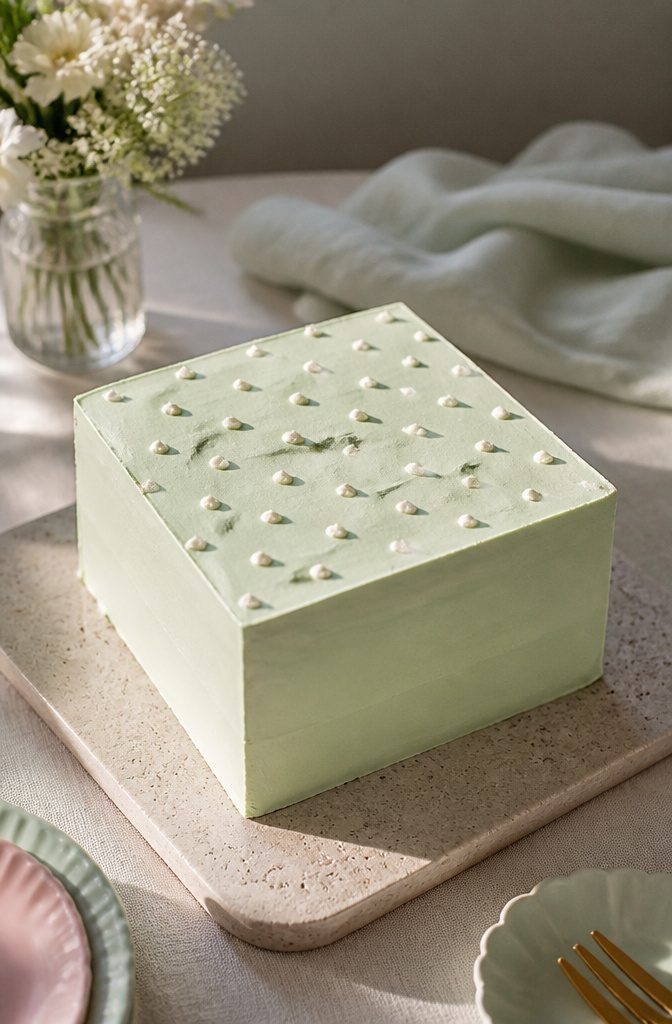
Square cakes earn their keep on a practical level first: clean edges give you more usable top surface than a round of the same width, and the shape fits a standard rectangular box without rattling around during delivery.
An 8-inch square is the size I would ask for, since it cuts into neat, even pieces that work well for an office gathering or a classroom party where fair portions matter.
The decoration itself is what makes this feel designed rather than default.
Mint whipped cream reads fresh without sliding into baby-shower territory, and the tiny white dots scattered across the top create a tension against the rigid geometry of the base that keeps the eye moving.
I would have these piped, not sprinkled; the slight dimension of piped dots catches light differently and keeps the surface from reading flat.
The baker’s tip here is specific: ask for small piped dots, not sprinkles, and specify the spacing so they feel scattered rather than grid-locked.
The result is a cake that looks planned but not labored over, which is exactly where simple cake designs should land.
5. Diagonal Lines Cake
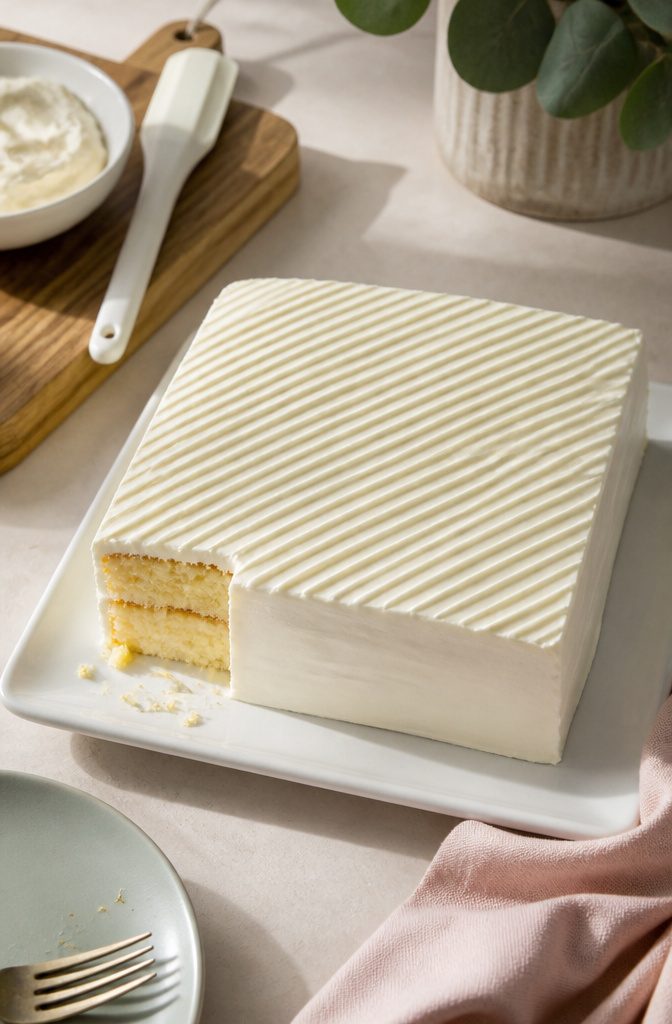
Thin piped diagonal lines across an otherwise plain cake read as precision because the eye expects them to waver and they do not.
The contrast between the bare surface and the ruled pattern is what makes this feel designed rather than decorated.
Space the lines about 2 cm apart in a single color, white against white or chocolate against vanilla, and the regularity does the work.
An 8-inch square cake suits this especially well.
The flat top gives the lines a longer run and the straight edges frame them like a margin. Round works too, though the curve shortens each stroke and the effect is slightly softer.
A piping bag with a small round tip is all you need.
No turntable required, no offset spatula, no stencils. The technique is in the wrist, not the equipment, and a line that goes slightly off can be lifted with the edge of a knife and piped again before the buttercream sets.
This is the option I would hand to someone asked to bring a cake to an office or to a teenager’s party. It looks considered without looking fussy, and it takes maybe ten minutes once the base coat is smooth.
6. Coffee Buttercream Cake

Chocolate curls look expensive, but they are forgiving once you know the trick. For this cake, you make a batch and cluster them in one corner only, leaving the rest of the top nearly bare.
The asymmetry reads as intentional, not unfinished, and it suits an adult celebration better than all-over frosting flowers or bright colors.
A plain coat of coffee buttercream gives the curls something to contrast against, both in color and flavor. The coffee notes balance the sweetness of the chocolate without requiring any extra elements on the plate.
You will need a bench scraper to smooth the sides, but no turntable is necessary; the uneven top edge gets hidden by the curl placement anyway.
The one-corner approach also means you can stop decorating when the chocolate runs out.
No matching the other side, no symmetry to fix if a curl breaks. It is the kind of simple cake design that looks like a decision rather than a shortcut.
7. Fondant Bow Cake

A single fondant bow on lilac cream does the work of ten piped roses.
The bow sits off-center, small enough that the baker finishes it in one sitting, and the lilac buttercream stays smooth because nothing else competes for space on top.
I like this for a birthday where the cake needs to look considered but the oven is still warm from dinner.
The fondant colors easily with gel, and a looped bow holds its shape for days if you let it dry on a curved surface first.
A small bow, maybe two inches across, keeps the proportion gentle against the cake rather than costume-y.
Ask for the bow on the side, not dead center, so the front photographs clean and the whole thing reads as modern rather than bakery-case generic.
Lilac buttercream needs real attention to tone. Too much purple and it turns Easter-egg bright; a drop of red gel in the violet keeps it muted and sophisticated.
Smooth the sides with a bench scraper and leave the top flat, almost stark, so the bow reads as the one deliberate choice.
8. Daisy Cluster Cake

A small cluster of buttercream daisies gathered on one side of the cake does what scattered flowers cannot. It keeps the eye anchored, gives the front a clear focal point, and photographs cleanly without demanding decoration everywhere else.
I like this arrangement because it reads as intentional rather than spare.
The grouping acts as a single unit, so you pipe five or six daisies where you want the eye to land and leave the rest of the surface smooth.
That smoothness is what makes the cluster stand out; too much competing detail and the daisies get lost.
Buttercream holds up better here than whipped cream, especially if the cake sits out during a warm afternoon.
The petals keep their shape and the pale yellow centers stay distinct. A soft lilac or white base underneath keeps the whole thing light without fighting the flowers for attention.
One band of sprinkles at the bottom edge adds enough fun for a birthday without cluttering the top, though I would skip them entirely if the occasion calls for something more restrained. The daisies alone carry it.
9. Sprinkle Band Cake

A band of sprinkles pressed into the buttercream at the base gives even a plain layer cake a finished look that reads as intentional rather than unfinished.
The placement matters: set them too high and the cake looks top-heavy; keep them within an inch of the bottom edge and they ground the whole design like a baseboard in a room.
You will need more sprinkles than you think. A generous handful covers the band evenly, and the excess falls onto the parchment you have already laid around the cake board.
Press them in while the buttercream is still soft, using the flat of your hand or a bench scraper held horizontally to nudge strays back into line.
Nonpareils work, but jimmies or sugar pearls catch light better and are easier to place one by one if a gap shows.
What makes this technique great is how forgiving it is. A wobbly top edge or uneven frosting above the band disappears against the busy lower border; the eye reads the straight sprinkle line as the true edge.
I skip the crumb coat if I am going this route and do a single thicker layer of frosting instead, since the sprinkles hide most texture issues anyway.
10. Navy Cream Cake with Stars
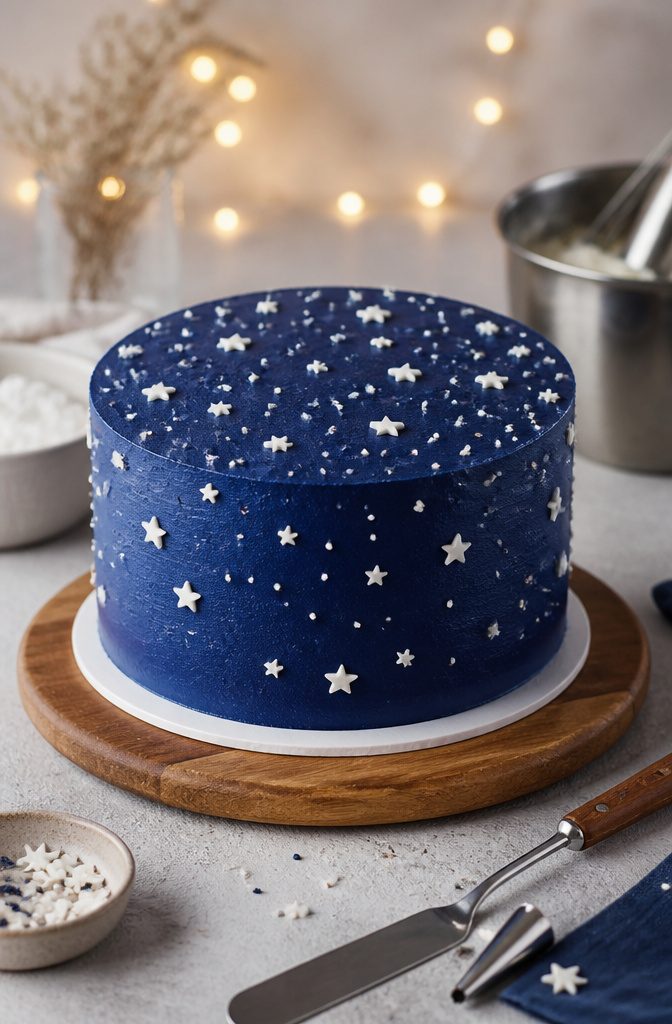
Navy cream with tiny white stars reads as a night sky, and that contrast of dark ground against small light points is what makes the design work for a five-year-old or a teenager.
The color handles the drama, so the decoration stays minimal.
Dark blue cream can carry a bitter aftertaste from the dye, which is the one pitfall worth planning around.
The fix is to build a white base first, then add just enough navy coloring to reach the shade. You get the depth without the metallic tang that overtinted buttercream leaves on the tongue.
White stars go on with a small round tip or even the blunt end of a piping coupler.
Space them unevenly, a little random like actual stars, and the cake avoids looking machine-made. No fondant skills required, no specialty tools, and the whole surface comes together in twenty minutes of actual work.
11. Football Cake
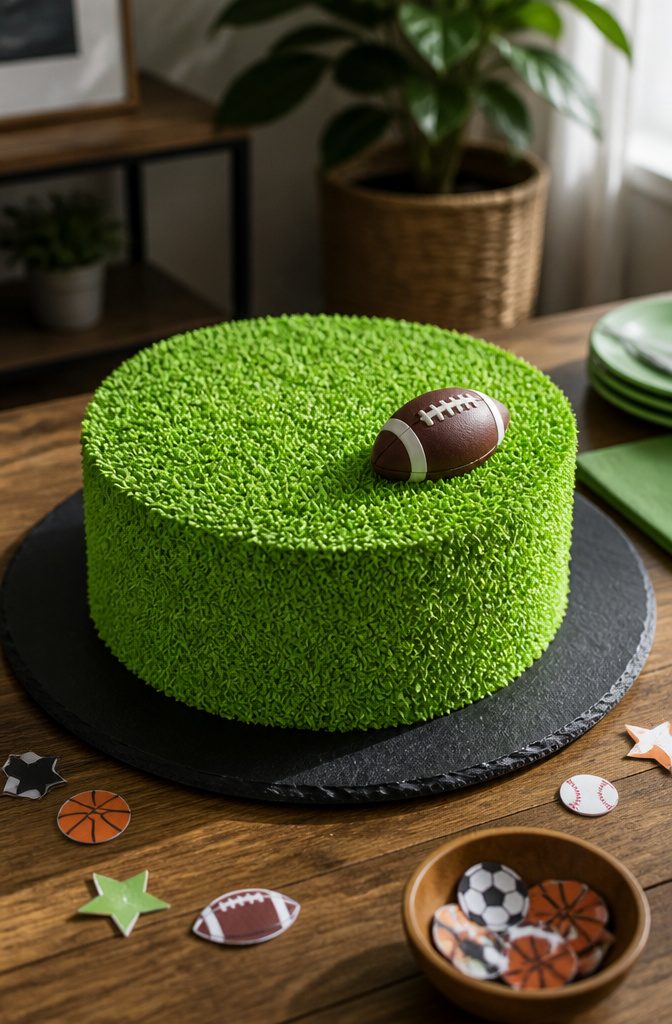
A single fondant football, about 5 cm across, sitting off-center on grass-green buttercream cream is the whole design. That is exactly why one themed element does the work of ten.
Green cream reads as field without painting yard lines or goal posts. The color alone carries the message, and a single brown football in fondant gives the eye somewhere to land.
Off-center placement keeps it from looking like a logo; it lets the cake read as a decorated dessert rather than a signboard.
This setup stays quick and cheap to change. Swap the football for a basketball and shift the cream to orange, and you have a different sport with the same twenty minutes of decorating time.
The small fondant shape sets hard enough to lift off before cutting, so no one bites into a chewy centerpiece.
Dark tinted creams can turn bitter, so build this one on a white base and add green gel sparingly.
The football itself is ordinary chocolate fondant, easy to tint with a toothpick of brown coloring. No special tools, no overnight drying, no structure to support.
12. Rocket Topper Cake
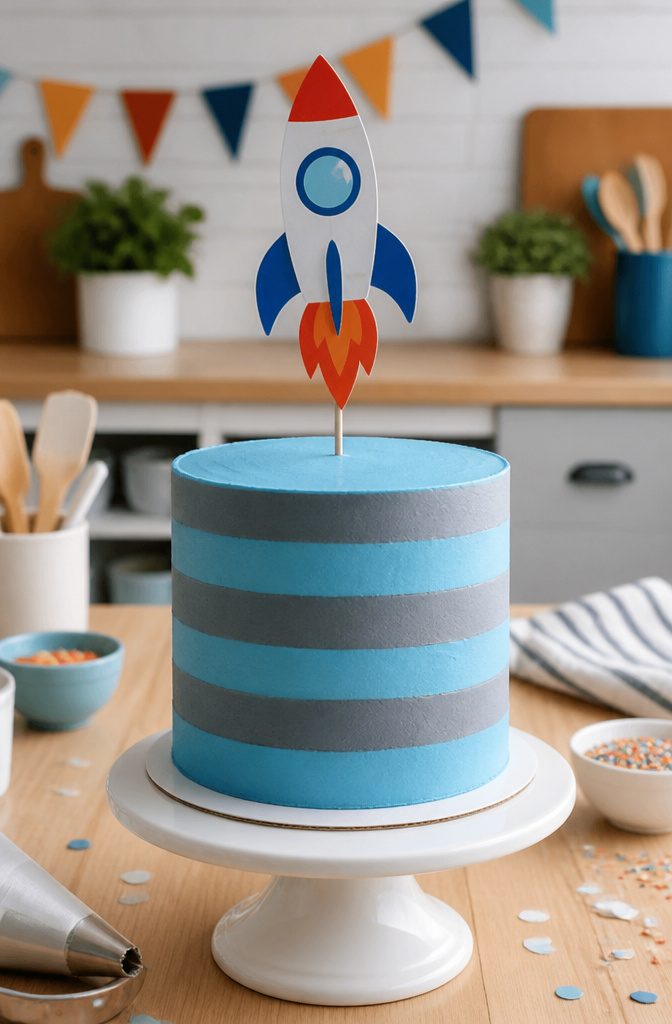
A paper rocket topper turns a basic striped cake into something a child actually points at.
The grey and blue bands keep the surface calm and graphic, while the three-dimensional topper supplies all the energy. I like this pairing because the flat pattern does not compete with the shape above it.
For the stripes, two shades of buttercream and a bench scraper are all you need.
Tint half your buttercream slate grey and half a medium sky blue. Frost the cake in grey first, then spread a thin vertical band of blue and scrape it smooth.
The scraper will drag the colors together slightly, which reads as a soft blend rather than a hard edge. That is forgiving if your hand wobbles.
The rocket itself is just cardstock, a drinking straw, and glue. Cut out a cone, a cylinder, and two fins; tape the straw to the back and poke it into a straw or dowel inserted into the cake.
It sits above the frosting, so there is no worry about soggy paper. Remove it before slicing and the stripes underneath are still intact.
Structure is the only catch. A tall cardstock rocket will lean if the straw is too short or the cake is soft.
I keep the topper under six inches and use a straw at least four inches deep in the cake. Anything taller belongs on a dowel anchored with a second skewer crosswise.
13. Pastel Confetti Cake

Pastel confetti on white cream reads as the classic party look because the scattered color does all the work against a neutral ground.
Keep the confetti to the edge and leave the center open for a name or short message piped in any color you choose.
This is the rare simple cake design that actually looks more intentional the less you add. A plain white buttercream base takes twenty minutes to smooth, and the pastel sprinkles go on in one pass with your hand.
No turntable tricks, no piping bags to wash. The trade-off is that the cake shows every flaw in the frosting, so the base coat needs to be genuinely smooth before the confetti goes on.
For a bigger group, a square shape in this same palette cuts into even pieces and keeps the look neat.
14. Red Velvet Crumb Cake

Red velvet crumbs on the sides give a cake texture without any piping at all. I trim the domed top from a cooled red velvet layer, then pulse those scraps in a food processor until they resemble coarse sand.
Press the crumbs onto cream cheese frosting only on the lower half of the cake; stopping at the midpoint keeps the look deliberate rather than messy and leaves the top surface open for a name or short message.
Cream cheese frosting is the right pairing here, not vanilla buttercream. Its slight tang reads as classic red velvet, and its softer set grips crumbs better than a crusting buttercream would.
The crumbs themselves carry enough color that you need no additional decoration, which makes this one of the simpler options for a weeknight birthday or anniversary.
The downside is that crumbs shed a little wherever the cake sits, so I place it on a cake board I do not mind wiping down afterward.
15. Palette Knife Cake

A palette knife leaves marks no piping bag can replicate. The tool creates ridges and valleys that catch light differently across the cake’s surface, giving you texture as the decoration itself rather than a base for something else.
I reach for an offset spatula or a true palette knife with a flexible blade. The bend matters more than the brand.
You want to press the edge into frosting and drag, letting the metal skip or glide depending on the pressure. A heavier hand leaves deeper troughs; a lighter one gives you subtle waves.
The real advantage is speed. No waiting for crust, no smoothing to perfection.
In fact, the less you smooth, the better this looks. I start with a crumb coat that’s intentionally imperfect, chill it just until firm, then add your final layer of buttercream with visible strokes working from the bottom up.
Each pass should overlap slightly so the ridges read as intentional rhythm, not accident.
Buttercream temperature is what separates craft from mess. Too cold and the knife skips, tearing the finish.
Too warm and the ridges slump into each other. Room temperature buttercream, about 70°F, gives you the most control.
This works on any shape, but a round cake shows the technique most clearly as the strokes curve with the edge. Keep the palette knife clean between passes; dried frosting on the blade drags and ruins the line.
16. Two-Tier Cake

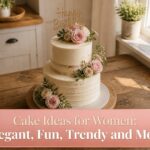
A two-tier cake with pearl rings brings real presence to a table without asking for advanced skills.
The structure itself does the heavy lifting: a 6-inch tier stacked on an 8-inch tier with support straws in the lower cake, and the finished piece feeds roughly 20 people.
A semi-naked buttercream finish forgives uneven spots that would show on a fully coated cake, and the bare edges read as intentional rather than unfinished.
Pipe or press pearl rings around each tier where they catch light and draw the eye upward, giving vertical structure without fondant work or sculpting.
Fresh fruit on top covers any last imperfections and adds color the rings don’t provide.
Keep the assembled cake refrigerated until the last hour; semi-naked cakes lose moisture faster than fully frosted ones, and the shorter air exposure protects the crumb.
17. Semi-Naked Cake
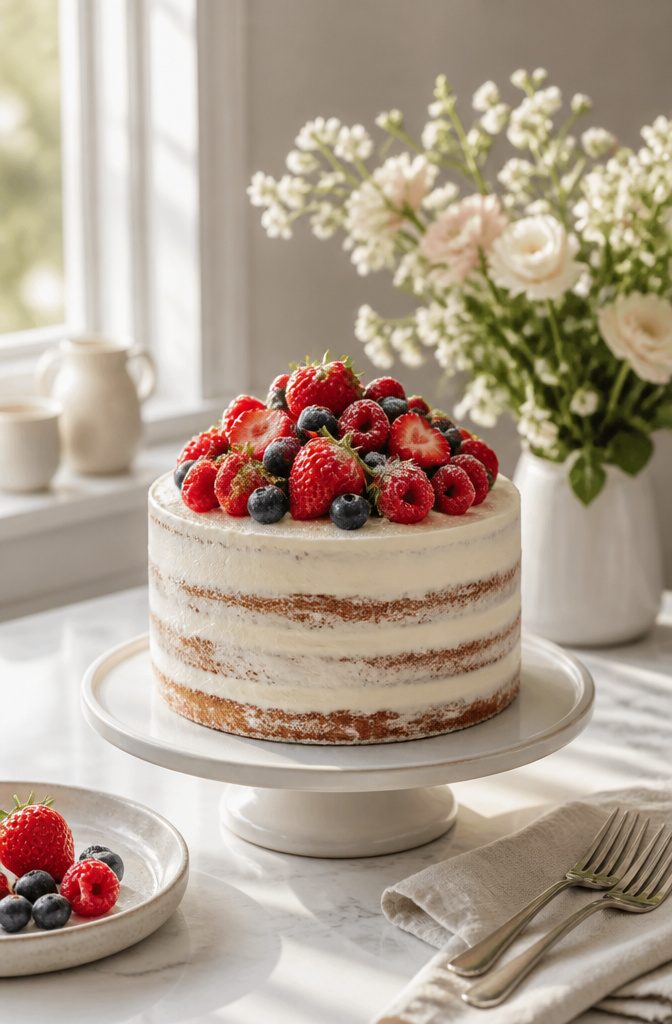
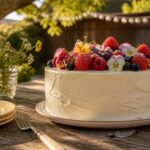
A semi-naked finish leaves just enough buttercream scraped thin so the cake layers peek through in patches. The look is forgiving for home bakers; small ridges or crumbs disappear into the texture rather than announce themselves.
Fresh berries piled on top do even more of that work, drawing the eye up and away from any uneven spots on the sides.
Exposure is the only catch.
With less frosting sealing the surface, the cake loses moisture fast. Keep it refrigerated until the last hour before serving and return any leftovers to the fridge promptly.
The berries themselves hold up better cold anyway, and the contrast of dark fruit against pale cream and bare cake layers is what makes this design worth the extra care.
18. Tea Cake
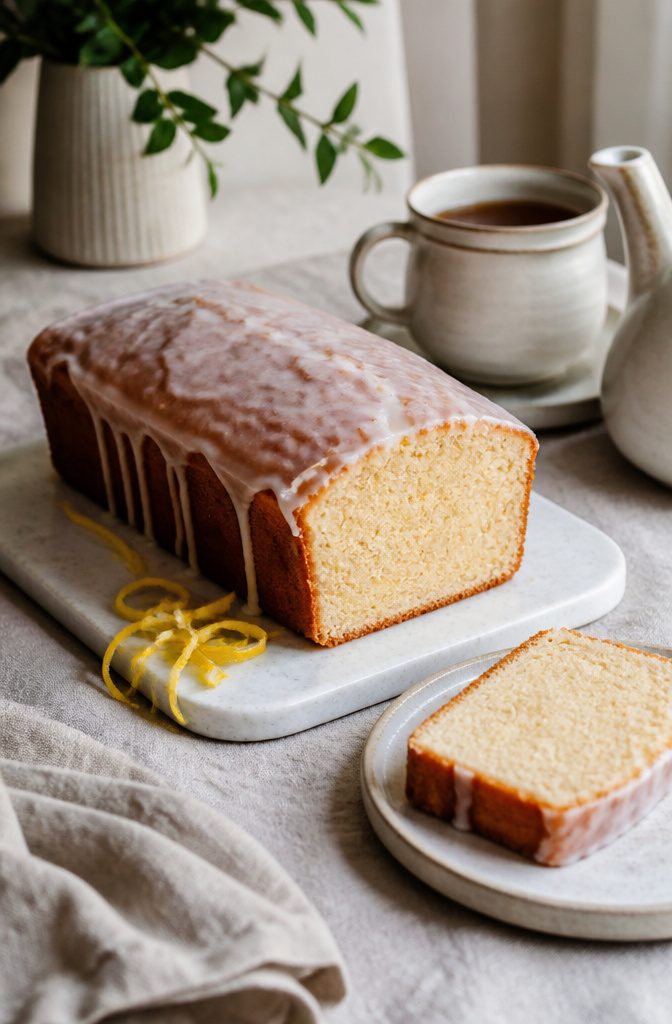
A thin glaze on a loaf-shaped tea cake is the simplest possible finish in this collection. No layers to level, no buttercream to build, no fondant to smooth.
The cake bakes in a standard 9 by 5 inch loaf pan, the kind already in most kitchens, and the glaze is nothing more than confectioners’ sugar thinned with milk or lemon juice until it runs off the spoon in a slow ribbon.
What makes it work visually is the contrast between the bare top crust and the drips that harden halfway down the sides. The glaze sets matte, not glossy, which reads as homemade in the best way.
Tea cakes keep well outside the refrigerator, a practical advantage for a small gathering or for anyone who finds cold cake unpleasant. They suit elders or a quiet celebration where conversation matters more than the centerpiece.
The decoration is the shape itself.
A clean slice on a plain plate is the whole presentation. If you want one extra step, a line of lemon zest or a few poppy seeds pressed into the glaze while it is still wet adds texture without complexity.
Essential Decorating Tools

A rotating cake stand is the one tool that changes everything for simple cake designs.
It lets you spin the cake while your hands stay in place, so a border of dots or a ring of rosettes comes out even without your having to walk around the table.
The small offset spatula does the opposite: it stays still while you move it.
Its angled blade slips under buttercream at the exact height you need, which means you can spread a top coat or lift a smudge without dragging your knuckles through the finish.
For the sides, a bench scraper gives you a straight edge against the cake while the stand turns.
Together they replace a drawer full of gadgets. The scraper doubles as a divider for striped effects, and the offset spatula spreads ganache drips back into place before they set.
You will use all three on nearly every design in this list, and none of them cost more than a midweek dinner out.
Cake Sizes and Servings
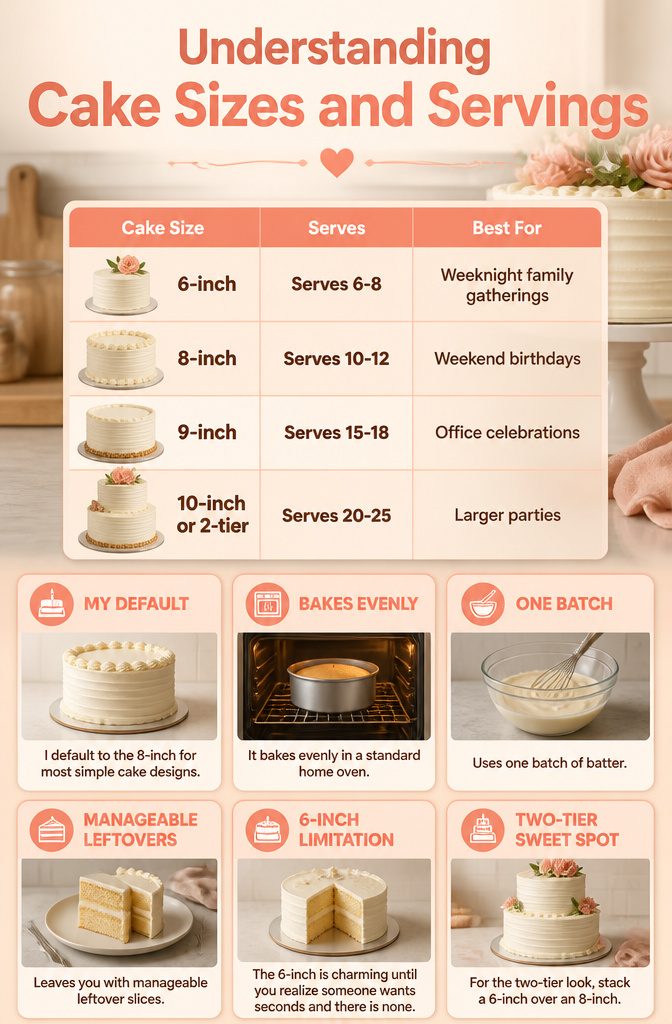
A 6-inch round covers a small birthday dinner for six to eight people, which is where most home bakers start.
Scale up to 8 inches when you need ten to twelve slices; the 9-inch pushes that to fifteen to eighteen. Anything past twenty guests, and a 10-inch or a modest two-tier setup is the practical answer at twenty to twenty-five servings.
| Cake Size | Serves | Best For |
|---|---|---|
| 6-inch | 6–8 | Weeknight family gatherings |
| 8-inch | 10–12 | Weekend birthdays |
| 9-inch | 15–18 | Office celebrations |
| 10-inch or 2-tier | 20–25 | Larger parties |
I default to the 8-inch for most simple cake designs. It bakes evenly in a standard home oven, uses one batch of batter, and leaves you with manageable leftover slices rather than a half-eaten cake.
The 6-inch is charming until you realize someone wants seconds and there is none. For the two-tier look, stack a 6-inch over an 8-inch; it reads as impressive without the structural stress of true tall-tier construction.
Frequently Asked Questions
Which is the best simple cake design for a birthday?
A round cake with one ring of rosettes and a clean top is hard to beat. The rosettes add color and texture, while the open center leaves room for a name in frosting or candles.
The single border also means you are not wrestling with full coverage, and the rosettes sit low enough to clear a cake carrier lid.
How do I keep a birthday cake simple design-wise but still special?
Pick one detail: a color you love, one bow, a ring of pearls, or a few berries. One clear idea looks planned; three small ideas look busy.
Can I get a simple happy birthday cake design with the name on it?
Yes. Most bakers pipe a short message free in a color of your choice.
The round cake with rosettes is especially practical for this; its clean top lets the name go in frosting, candles, a small banner, or even edible marker on the bare surface.
How to easily decorate a cake for beginners?
Start with a palette knife or offset spatula for texture, or press sprinkles into soft buttercream for a finished look without piping.
The palette knife technique needs no smoothing to perfection; visible strokes working from bottom up create intentional ridges. A rotating cake stand, small offset spatula, and bench scraper are the three tools that replace a drawer full of gadgets.
What are some creative cake designs for birthdays?
The ombre cake builds color gradation into the frosting itself, skipping piping bags entirely.
The ganache cake uses two ingredients for a mirror finish with edible gold dust for contrast. The rocket topper cake pairs grey and blue buttercream stripes with a paper rocket for a graphic look a child will point at.
Which cake is in trend now?
Semi-naked cakes with thin buttercream and peeking cake layers remain popular, often topped with fresh berries.
The two-tier version with pearl rings brings table presence without advanced skills. Palette knife texture is also current; the tool marks catch light across the surface and need no additional decoration.
How to make a basic cake at home?
A tea cake in a standard 9 by 5 inch loaf pan is the simplest option in the collection.
No layers to level, no buttercream to build. A thin glaze of confectioners’ sugar thinned with milk or lemon juice runs off the spoon in a slow ribbon and sets matte.
The cake keeps well outside the refrigerator, and a clean slice on a plain plate is the whole presentation.